Saturday, March 31, 2012

Physician's Formula Nude Eyes eyeshadow palette tutorial!!!

Hey everyone! So I created this look today using the NEW Physician's Formula Shimmer Strips Nude eyes eyeshadow palette! I really like this look, its kind of a smoky look but very wearable for daytime :) So lets get started...

As always I'll list the products I used for my entire makeup look and then I'll get into the tutorial....


Here's the products I used for my face makeup:

FACE:

  • Smashbox Photo finish light face primer
  • Milani Multi-tasker face powder
  • Sei Bella Tinted moisturizer in Fawn
  • Benefit Hervana Blush

Here's the products I used for my eye makeup:

EYES:

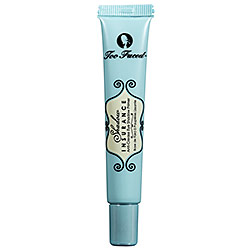
  • Too Faced Shadow insurance
  • Physician's Formula Nude eyes palette
  • Stila eye kajal eyeliner pencil in Tiger's eye
  • Covergirl professional all in one mascara in blackest black

And finally, here's the products I used on my lips:

LIPS:

  • Sun Shades Lip balm in Vanilla bean


Ok, here's the tutorial:


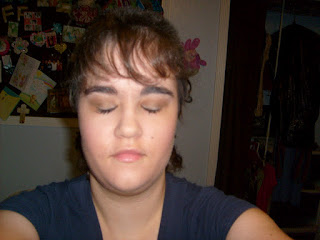
So the first thing I did was I primed my eyes with too faced shadow insurance eye primer, then I went to my physician's formula nude eyes eyeshadow palette and taking a flat eyeshadow brush I applied the light brown shade (1 shade down from the pearly white shade at the top). Next I took a crease brush and I applied the light pearly purple shade to my crease (5 shades down from the white shade at the top) and then I blended that out. Next I applied Stila eye kajal eyeliner pencil in Tiger's eye to my upper and lower lash line and I took a Q-tip and smudged that liner out to make a "smoky" look. I then applied Covergirl professional all in one mascara in blackest black to my top and bottom lashes. Lastly to complete my entire look, I applied to my lips sun shades lip balm in vanilla bean. And the staying power of these shades is GREAT! I applied my makeup at 10am this morning and probably won't take it off until at least 8:30pm tonight. I just checked to see how it stayed throughout the day and my eye makeup looks fresh still! So, I'm very impressed with these shadows! A review will be coming on this palette very soon! :)


And thats it! It's really simple and yet natural. I hope y'all enjoyed this tutorial and I hope y'all will try it out! :) More tutorials and reviews coming soon, so watch for those! Have a great night!

Thursday, March 29, 2012

Sephora Wish List....

Hey Everyone!!! I was inspired by emilynoel83's (beauty broadcast) post of her Sephora wishlist items, so I thought I would share my Sephora wishlist items. Lets get started....


  • Benefit Legally Bronze kit, $38.00

This kit is awesome! It includes a full size Hoola Bronzer, High beam, a highlighting pencil and mascara in brown. I mean this is a great kit, the hoola bronzer alone is $28.00!! So that is just great! Because for $10.00 more you're getting 3 more products in addition to the hoola bronzer. So I think would be a great buy!!


  • Too Faced primed and poreless face primer, $30.00

I've heard great things about this primer and I LOVE Too Faced shadow insurance, so I thought I would probably really like this too! I can't wait to go purchase it sometime! It's supposed to make your pores go away and it has Retinol in it so it fights acne! Which is great, so I'm excited for this primer!


  • Too Faced Natural at night eyeshadow palette, $36.00
Ever since I saw emilynoel83's tutorial with this palette I fell in love with it!! The shades are gorgeous and they are great for obviously going out at night!! So I can't wait to go out and purchase this palette! It looks amazing!


  • Urban Decay Naked palette, $50.00

I know everyone has this palette already, but I have yet to purchase this!!! I love the shades in it and you get a mini urban decay primer potion along with a good karma brush! And 12 gorgeous shades!! I've seen many tutorials with this palette and I've seen countless reviews as well. My mom makes fun of me for how much eyeshadow I have, but I just keep collecting more and more! I have mostly wet n wild and I have the Coastal scents 88 warm palette, also I just picked up the physician's formula nude eyes palette and so the naked palette would be a great addition to my collection!! So I hope I can purchase this soon!


Well, thats it for my Sephora wishlist! I hope you have a great night y'all!!

Monday, March 26, 2012

CVS Haul!!!

Hey everyone! I just got back from CVS and I wanted to share with you my haul of what I got. Lets get started...

I went there to look at 3 items, but I ended up only purchasing one thing. I got Physician's Formula shimmer strips nude eyes eyeshadow palette!! It was on sale for 40% off the original price! So I ended up only paying $7.29 for it :) And I got $7.00 in extrabucks! I love the shades in this palette because you can make a dramatic look or a natural look. Its a very versatile palette!


Anyways, the reason I got it was because it's been classified as a dupe for the expensive Urban Decay Naked 2 palette! So I can't wait to try it out and show you some tutorials! I'll probably do a tutorial with it on Saturday, so keep your eyes out for that!

Well that's it for my haul!! Have a great day!

Saturday, March 24, 2012

Wet n Wild's blue had me at hello & Cool as a cucumber combo eyeshadow tutorial...

Hey Everyone! So as I said this morning, I wanted to share with you a eyeshadow look that I just created. It's using Wet n Wild's Blue had me at hello in combination with Cool as a Cucumber. And I took my pictures with my computer's webcam today, because my camera batteries are dead. So as usual I'll show you what I used for my entire face makeup and I'll list the products, then I'll get into the tutorial.


Ok, so here's the products I used on my face:

FACE:

  • Smashbox photo finish light face primer
  • Milani multi-tasker face powder
  • Sei Bella Tinted Moisturizer in Fawn
  • Benefit Hervana Blush

And here's what I used on my eyes:

EYES:


  • Too faced shadow insurance
  • Maybelline eye studio color tattoo cream eyeshadow in Bad to the Bronze
  • Wet n Wild Blue had me at hello eyeshadow palette
  • Wet n Wild Cool as a cucumber eyeshadow palette
  • Covergirl professional all in one mascara in Blackest black

and lastly, what I used on my lips:

LIPS:

  • Sun shades lip balm in vanilla bean
  • Revlon colorburst lip butter in Pink Truffle


ok, so here's the tutorial:


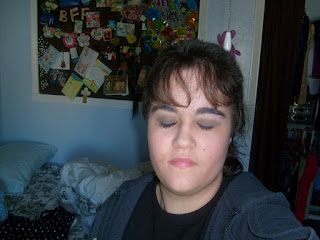
ok, the first thing I did was I primed my eyes with too faced shadow insurance. Then I applied Maybelline eye studio color tattoo cream eyeshadow in Bad to the bronze. I blended that shadow out with my fingers and then went to my Wet n wild blue had me at hello palette. I took a flat eyeshadow brush and took the dark blue shade 3 colors down on the right side of the palette. I then blended that out, and taking a crease brush I went to Wet n wild's cool as a cucumber palette. And I took the purple shade in the middle of the palette. I then blended that out with the same crease brush. To complete my look I applied covergirl professional all in one mascara in blackest black to my top and bottom lashes. But to complete my entire makeup look, I applied sun shades lip balm in vanilla bean and revlon colorburst lip butter in pink truffle over the top of the lip balm.


Well thats it! I hope you enjoyed this tutorial and I hope you'll try it out :) I hope you have a great day!

Reviews on Smashbox Photo finish light face primer and Too faced shadow insurance...

Hey everyone! I hope y'all are having a great Saturday morning! I just wanted to share with you all a long overdue review of Smashbox Photo finish light face primer and Too faced shadow insurance.


I'll start off with a review on Smashbox photo finish light face primer. I love this primer! I bought the travel size last year, so I could just try it out and see if I liked it. The travel size cost me $15.00, but it was worth it! This primer claims to be great for people with acne-prone skin, oily skin and sensitive skin. It is oil-free and it's 60% water based so when you apply it, it refreshes on contact and the little oil absorbers provide a smooth, matte finish all day. So those are the claims and I think it lives up to those claims. However, I don't think it keeps your face matte all day. I put this on in the morning around 8am and by the time I get home around 9pm, my forehead looks and feels like an oil slick. I have oily skin in my T-zone, I'm acne prone and my skin is sensitive. So by the middle of the day, my skin feels oily.

So that would be the only con to this primer, everything else about it I love. Accept for the $15.00 price tag. The full size of this product costs $36.00 and I'm not willing to pay that much. But anyways, this primer has lasted me for a long time. I purchased this in August of last year and I'm just now starting to run out of it. So overall, I love this primer! There are just a couple cons that I have, but otherwise it's great!


Ok, moving on to Too Faced shadow insurance eye primer. This is amazing! I use this every morning to prime my eyes before putting on my eye makeup and I have to say it keeps my eyeshadow on all day! It keeps it looking fresh and my shadows don't crease. Again the only thing I would have to say that I believe is a con, is the $18.00 price tag. I mean, for a good primer I think its worth it. But I know that some people are on a tight budget and can't fork out those $18.00 for a primer, me included. So I would love to find something thats a low cost alternative and I have yet to find something. But again, its lasted me an incredibly long time. I bought this the same time I bought the face primer in August of last year and I still haven't run out yet, though I think I'm getting close unfortunately. And also if you're wondering, it does come in a tube. Which I think is very helpful, because when you start getting low you can make sure youre getting all the product out with the squeeze tube. The same thing goes for the face primer, it is also a squeeze tube.


So thats my review of those products! I think they're great products I just think that the price could be less. Please let me know if you've found a low cost alternative to either of these products, I would be so happy! Thanks for reading and I'll be blogging again soon! I actually will do another eye makeup tutorial I think later today, so keep your eyes out for that. Have a great day!

Wednesday, March 21, 2012

Wet n Wild Vanity eyeshadow palette #3.....MATTE EYES!!!

Hey everyone! Sorry its been a few days since I've done a blog. Things have been really busy with school and such. But anyways, I just put on my makeup for the day (I know its almost 2pm) and I used Wet n Wild's Vanity palette yet again, but this time I used the matte side of the palette. So here's the products I used and then I'll get into the tutorial.


Here are the products I used for my face makeup:

FACE:

  • Smashbox Photo Finish Light face primer
  • Milani Multi-tasker Face powder
  • Sei Bella Tinted Moisturizer in Fawn
  • Benefit Hervana Blush

Here are the products I used for my eye makeup:

EYES:

  • Too Faced Shadow Insurance
  • Maybelline Color tattoo cream eyeshadow in Tough as Taupe
  • Wet n Wild eyeshadow palette in Vanity
  • Maybelline new york master drama eyeliner pencil in Vibrant Violet
  • CoverGirl professional all in one mascara in blackest black

And finally, here are the products I used on my lips:

LIPS:

  • Sun Shades Lip Balm in Vanilla Bean
  • Revlon Colorburst lipstick in petal


ok, so now that I've listed all the products I used, lets get into the eye makeup tutorial:


So the first thing I did was I primed my eyes with Too Faced shadow insurance, I let that dry for about 10 seconds and then I applied maybelline color tattoo cream eyeshadow in Tough as Taupe. I blended that shadow out with my fingers. I then went to my Wet n Wild palette in Vanity and taking a flat eyeshadow brush, I placed the cream white shade on the right side of the palette to my browbone. I then took the matte chocolate brown shade with the same flat shadow brush and I placed this shade on my entire lid. I took a crease brush and blended that out. Then taking same crease brush, I went to the lighter brown shade and applied it to my crease. After I blended that out, I lined my upper lash line with maybelline eye studio master drama eyeliner pencil in Vibrant Violet. And finally, to complete my eye look I applied covergirl professional all in one mascara in blackest black to my top and bottom lashes. To complete my entire look I applied to my lips sun shades lip balm in vanilla bean and after that moisturized my lips I applied revlon colorburst lipstick in petal over the top of the lip balm.


And thats it!! I thought that it was a really simple look and I wanted to share with you all. I hope you'll try this look out :) and please let me know what you think :) Have a great wednesday afternoon!

Sunday, March 18, 2012

Wet n Wild Walking on Eggshells eyeshadow palette tutorial...

Hey guys! I hope y'all are having a great Sunday afternoon! I wanted to share with you another makeup tutorial using Wet n Wild's Walking on Eggshells eyeshadow palette. This is a really simple, natural look. I wore this look yesterday and I really liked it, so I created the look again today for church this morning. So as I've always said I'll show you what I used for my entire face makeup and then get into the tutorial. So lets get into the tutorial....
So here's what I used for my face makeup:


FACE:


  • Smashbox Photo Finish light face primer
  • Milani Multi-tasker face powder
  • Sei Bella Tinted Moisturizer in Fawn
  • Benefit Hervana Blush


Here's the products I used for my eye look:


EYES:

  • Too Faced Shadow Insurance eye primer
  • Maybelline color tattoo cream eyeshadow in Tough as Taupe
  • Wet n wild walking on eggshells eyeshadow palette
  • Covergirl professional all in one mascara in Blackest black

And finally, here's the products I used on my lips:

LIPS:

  • Sun Shades Lip Balm in Vanilla Bean


So here's the tutorial:


So first I applied my too faced shadow insurance eye primer and let that dry for about 10 seconds, then I applied maybelline's color tattoo cream eyeshadow in Tough as Taupe. After I blended that shadow all out, I went to my wet n wild walking on eggshells palette and taking a flat eyeshadow brush, I applied the light pink shade over the top of the tough as taupe cream eyeshadow. Then I took the same flat shadow brush and I applied the white pearly shade on my browbone. After I blended those shadows out, I took a crease brush and applied the medium teddy bear brown shade to my crease. And taking the same crease brush, I blended that shadow out. To finish my eye look, I applied my covergirl professional all in one mascara in blackest black to my top and bottom lashes. Lastly, to complete the entire look I went with a subtle lip balm sun shades lip balm in vanilla bean. As I've always said, the staying power of these shades is amazing! I applied this makeup at 7:00am this morning and I probably won't take it off until 8:00pm tonight. As I look at it now, it still looks like I just applied everything! So I'm really happy with that :)

And thats it!! Pretty simple I think. And I think its a really pretty look that you can wear everyday or you could dress it up with a liner and have it be a more dramatic, night out look. I hope you enjoyed this tutorial and I'll be postig more reviews and tutorials soon! Have a great Sunday everyone! :)

Wednesday, March 14, 2012

Wet n wild Vanity eyeshadow palette tutorial #2.....

Hey everyone! I hope you're having a wonderful Wednesday morning despite the rain :) Anyways, I wanted to share with you another tutorial using Wet n Wild's Vanity palette. I love this look I created, its very sultry yet natural. So lets get into the tutorial:
Here's what I used on my face:


FACE:

  • Smashbox Photo Finish light face primer
  • Sei Bella Tinted moisturizer in Fawn
  • Milani multi-tasker face powder
  • Benefit Hervana blush

Here's the products I used for my eye look:

EYES:

  • Too Faced Shadow Insurance eye primer
  • Maybelline eye studio color tattoo cream eyeshadow in Bad to the Bronze
  • Wet N Wild eyeshadow palette in Vanity
  • L.A. Girl FineLine liquid eyeliner in Black
  • CoverGirl professional all in one mascara in Blackest Black

And lastly here are the products I used on my lips:


LIPS:

  • Sun Shades Lip Balm in Vanilla Bean
  • Revlon Colorburst Lip Butter in Pink Truffle

Ok, so those are all the products I used for this look and here's how I created this look:


I first primed my eyes with Too faced shadow insurance, after I let that dry for about 10 seconds I applied Maybelline eye studio color tattoo cream eyeshadow in bad to the bronze. I then patted that shadow so that I could make sure it was blended and applied evenly across my entire lid. After that dried, I went to my Vanity eyeshadow palette and using a flat shadow brush, I took the shimmery brown shade on the right side of the palette. Then using a crease brush, I applied the darker brown matte shade on the left side of the palette in my crease. I then blended that out using the same crease brush. I then applied my L.A. Girl FineLine liquid eyeliner in black to my upper lash line. Lastly I applied my CoverGirl professional all in one mascara in blackest black to my top and bottom lashes. To complete the entire look, I applied my Sun Shades lip balm in Vanilla Bean to my lips. I then went over that with my Revlon Colorburst Lip Butter in Pink Truffle.


Ok, thats it! Its very simple, yet sultry and very natural. I hope you liked this tutorial and I hope y'all with try this look out :) Have a great day!! :)

Monday, March 12, 2012

Wet n wild's vanity eyeshadow palette review....

Hey everyone! I hope you're having a great Monday afternoon! I just wanted to share with y'all my review on Wet n Wild's eyeshadow palette in Vanity. This is a 6 color palette and I actually really, really like this alot! The reason being is that one side has three shades that are totally matte and the other side has three shades that are shimmery.


You can refer to my latest post for a tutorial I did using this palette. The shades in this palette are very pigmented and rich, they blend super easy and the color pay off is excellent! I applied my makeup on Saturday at about 12pm and didn't remove it until about 11pm that night. And all the shadows stayed perfectly fine and still were really rich in color. So I'm very pleased with that. You can pick this up at Walgreen's for around $4.99. I think for the price and the quality of these shadows, every woman should have at least one of these palettes in their collection! If you pick one of these up, you won't be disappointed! Well,  thats it for my review of Wet n Wild's Vanity palette. I hope y'all have a great night! Keep your eye out for more reviews and tutorials using the wet n wild eyeshadow palettes coming soon! :)

Saturday, March 10, 2012

Wet N Wild Vanity Palette Tutorial....

Hey everyone!! I hope you are having a great Saturday morning! I just wanted to share with you a look I created using Wet N Wild's Vanity palette. This look is a very sexy, sultry look that I feel is for a night out. I'm going to a concert tonight and I wanted something a litte darker and sexier than a nude eye look, so I came up with this! Orginally, I was going to use wet n wild's blue had me at hello palette but it didn't turn out how I wanted, so I went with the vanity palette. So lets get started...

I'll show you my full face makeup and what I used as well.


Ok, so here's what I used for my face makeup:

FACE:

  • Smashbox Photo finish light face primer
  • Sei Bella Tinted moisturizer in Fawn
  • Milani Multi-tasker face powder
  • Benefit Hervana Blush

And here's the products I used for my eye look:

EYES:


  •  Too Faced Shadow Insurance Eye primer
  • Wet N wild Vanity Palette
  • L.A. Girl FineLine liquid eyeliner in black
  • Covergirl professional all in one mascara in Blackest Black

Also, here's what I used on my lips:

LIPS:

  •  Revlon Colorburst Lip Butter in Pink Truffle


Ok, so there's the list of products I used. Now lets get into the tutorial:


So using a flat eye shadow brush, I used the shimmery brown shade on the right of the palette and I placed this all over my lids. Next, I used my L.A. Girl fineline liquid liner in black and I lined my upper lash line. Then I went back to my vanity palette, and taking the same eye brush I used the matte brown on the left side of the palette and I placed this shade close to my lash line where I just put the liner. Then I took a fluffy crease brush and blended everything out. I finally finished the look with my covergirl professional all in one mascara in blackest black, I placed this on my top and bottom lashes.


And thats it! Its pretty simple, but yet I believe very put together. I hope you enjoyed this tutorial! Please feel free to try this look out using whatever products you have. I hope you guys will try this out :) Let me know if you like it :) Also please let me know if you like these tutorials, I love doing them, but I want these posts to be enjoyable for you to read so please let me know if you like these tutorials in the comments section.  Have a great day everyone!

Thursday, March 8, 2012

Maybelline Color Tattoo eyeshadow review...

Hey guys!! I hope y'all are having a great Thursday afternoon! I just wanted to share my review on the Maybelline eye studio color tattoo eyeshadows. I'm sorry I'm so late getting this review to you guys, but things have been really busy and I've just forgotten to do the review until now. So my apologies :) But lets get started....

So the first color I have is called Bad to the bronze. I really like this color, its got a little bit of sparkle to it but its pretty natural.


Its just a really pretty bronzy-brown color with a gold undertone to it I feel.


Next color I have is called Tough As Taupe. Now this color is pretty much a matte shade. Its a sort of muddy brown-taupe color. Its also very natural.


This is a great color! Very nice pigmentation in both of these shades. You don't have to rub your finger in them to many times to get the color payoff that you want. I usually have to rub my finger in them 2-3 times to get a good swatch. But all in all, I love these shadows!!

And I have to say, I put some swatches of both shades on my hand and you can't remove them without using a makeup remover or makeup wipe! That says alot about their staying power, I was surprisingly very impressed at the staying power of these shades. So that is a plus!

Well, I think thats it for this review. I hope you enjoyed it and found it helpful for if you want to purchase these yourselves. I bought them at Walgreen's, when I bought these they were buy one get one 50% off, so that was a good deal. But they're regularly priced at $6.99, but if you can find a sale on them its a better buy :) You can also find them at Ulta and Target if you don't have a Walgreen's near you. Ok, thats it! Have a great day!

Wednesday, March 7, 2012

Wet n Wild color icon eyeshadow trio Cool as a Cucumber review....

Hey guys!! I hope y'all are having a wonderful Wednesday night :)
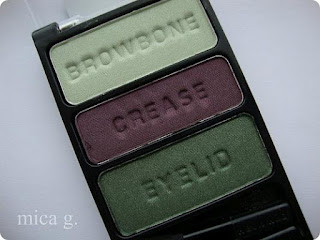
I just wanted to share with you my review on Wet N Wild's eyeshadow trio in Cool as a Cucumber. I really, really like this trio! You can refer to my lastest post to see the look I did with this palette. It's very pigmented just like the other palettes that Wet n wild has. They are just really beautiful shades :)


This palette is just gorgeous, is it not?! I mean, high quality shadows at drugstore prices absolutely I'll buy them!! They are just really amazing :) and the staying power is pretty amazing as well :) I did this look at about 10am and its 5:05pm now and all my shadows are still there! They haven't faded at all! So I'm really impressed with the staying power of these shades :) I really reccomend picking up one of these Wet N Wild palettes for yourselves. I think you'll really like them!


Well, thats my review of my Wet N Wild palette in cool as a cucumber. I hope you enjoyed this review and I hope you have a great night! :)

Also, more tutorials and reviews coming soon so stay tuned for those! :) 

Cool as a Cucumber wet n wild eyeshadow palette look....

Hey everyone! So I just did this look using Wet n Wild's color icon eyeshadow trio in Cool as A Cucumber. So if you want to see how I did this look....keep reading :)


So I'll just list what I used for my face makeup first:

FACE

Smashbox Photo finish light face primer

Sei Bella Tinted Moisturizer in Fawn

Milani Multi-tasker Face powder

Benefit Hervana Blush


Ok, so here's what I used for my eye look:


EYES

Too Faced Shadow Insurance eye primer

Milani Multi-tasker Face powder

Wet N wild color Icon eyeshadow trio in Cool as a Cucumber

Covergirl professional all in one mascara in Blackest black

and I'll list what I used on my lips:

LIPS

Sun Shades Lip Balm in Vanilla Bean


So here's how I did this eye look:


After I applied my too faced eye primer and I set that with Milani multi-tasker face powder, I took my wet n wild palette, and placed the light green shade on my browbone. Then I placed the darker green shade on my lid, blended that out then (using a crease brush) I placed the dark purple color in my crease. I then blended that out. Then I applied my Covergirl all in one mascara to my top and bottom lashes. Also you can apply these shadows any way you want to, I just decided to follow their suggestion to put the colors where they say for them to go.


Well, thats it!! Thats how I did this look, very simple and very easy. I hope you enjoyed this and I hope I explained this in a way that wasn't too confusing :) Have a great day!! Let me know if you tried this out and if you liked it :) I would appreciate any feedback on this tutorial, since this is my first time doing one :) Thanks so much!

Monday, March 5, 2012

Wet N Wild's Knock On Wood eyeshadow trio review....and MORE!!

Hey everyone! I hope y'all are having a wonderful Monday evening and I hope you had an even better weekend :) So I just wanted to share with you some reviews on a couple of the new products I tried today that I got on Saturday at Walgreen's. Lets get started....

So the first thing I'm going to review is Wet N Wild color icon eyeshadow trio in Knock on Wood. I realy like this palette first of all. The shades are so gorgeous and so pigmented! The color pay off is amazing!


Out of all the colors in this palette, each one is my favorite because they all have something unique about them. The eyelid shade is gorgeous! It's like this medium deep purpley-plum shade. And the crease color is a rich dark brown, so pretty! And the browbone shade is a little lighter than the eyelid color I feel. Its just gorgeous! Can't wait to show you guys the look I created with this palette :D


Ok, onto the next product which is Maybelline eye studio master drama eyeliner pencil in vibrant violet. I really like this liner also! I swatched it on my hand yesterday and it's a gorgeous deep plum color. It glides on so smooth onto your lid and smudges out a little to create a kind of smoky eye look. I love that its an automatic liner, so you don't have to sharpen it. But for some reason after I applied it to my lid, I went to put the lid back on and it looked like the liner was almost gone already! I mean its down to pretty much a stub and I barely used any. So I don't know what do about that because I tried to twist the pencil up to allow more liner to come up and it wouldn't come up :( So I don't know, I'll figure it out :)

I also wanted to let you know guys know that I returned the Lo'real Voluminous False Fiber Mascara to walgreen's today. I actually picked up the wrong one, I orginally wanted to get Lo'real Voluminous Million Lashes Mascara which when I returned the other mascara I was going to purchase this one. But I decided to wait until my Covergirl Professional All-in-One mascara either dries out or I run out of it :) So all that to say, I obviously will not be reviewing the Lo'real Voluminous False Fiber mascara.
So that's it for my reviews! I'll be posting a look that I created with this palette and eyeliner very soon! Have a great night!

Saturday, March 3, 2012

Yet another Walgreen's Haul...

Hey guys! I hope y'all are having a fantastic Saturday afternoon! I just wanted to share with you a little haul of some things I picked up at walgreen's today. So lets get started...

The first thing I picked up was Lo'real Voluminous False Fiber Mascara in blackest black. I have been wanting to try this mascara for  a while, but I just never picked it up because I kept reading mixed reviews on it. So I finally just told myself that I should pick it up and see for my myself if it's good or not. I picked this up for $7.99!! So there will be a review coming on that soon!


The next thing I picked up was Maybelline Eye Studio Master Drama eye pencil in Vibrant Violet. I wanted to try this for a couple reasons. One being that my most favorite eyeliner Stila eye kajal in Tiger's eye is down to a stub and the other reason being that I didn't want to pay the ridiculous $18.00 for a new one from Stila, so I just decided that I would try the one from Maybelline. I'm really excited to try it because one it's automatic so you don't have to sharpen it! And the other reason is that it's only $7.99!! So I can't wait to try that. A review will be coming on this also very soon.


Next, I picked up 2 more Wet N Wild Color icon eyeshadow trios and 1 Wet N Wild color icon eyeshadow 6-pan palette. The colors I got in the trios are Cool as a Cucumber and Knock on Wood. The color I got in the 6-pan palette is Blue had me at hello. As you know, I absolutely LOVE Wet N Wild eyeshadows! They are so pigmented and rich and just AMAZING! Another thing I want to mention about these palettes is that they are SO reasonbly priced, I picked up the trios for $2.99 each and the 6-pan palette was $4.99. I mean, you really can't beat the price for good quality shadows.  A review will be coming on those as well very soon.


Well, thats it for my first haul for the month of March! There will be more coming soon. I don't have pictures of the products I got to show you because my camera kept whiting everything out, so my apologies :) But I'll try and get some pictures soon! Have a great day everyone! Keep your eye out for some reviews coming soon on these products :D

Thursday, March 1, 2012

Covergirl Fresh Complextion Concealer review....

Hey everyone! So I wanted to review for you the Covergirl Fresh Complextion Concealer in Soft Honey. I tried this concealer out this morning to cover up some redness around my nose and some blemishes I have on my cheeks, forehead and chin. I have to say, it did a really nice job covering up the things I wanted. It didn't appear cakey through my tinted moisturizer and it blended in really nice. So for a first time use, I'd give it a B+. The applicator is a doefoot, it picks up the product really well. The concealer is in a tube, and I only had to dip the applicator in the product once to get enough product for my face. I did have to dip the applicator in one more time to cover my forehead blemishes, but other than that a one time dip was all I needed.

The color matches my skin tone perfectly, which is great. My overall first impression is that it is a really good concealer. My mom actually picked this up at Walgreen's a few months ago for FREE because we coupon shop. I don't remember exactly how she got it for free with the coupons unfortunately, so I can't tell you how to get it for free. But just watch for deals in your Sunday Paper from SmartSource, Redplum and P&G. All three should have some beauty coupons inside them. So anyways, I really like this concealer, if you can't get coupons for it then it is available at Walgreen's for $5.49.

Well, thats it for my review of the Covergirl Fresh Complextion Concealer. I hope you found this helpful and I hope you enjoyed it. Have a great night!

Benefit Hervana Review...

Hey everyone! I hope y'all are having a wonderful Thursday afternnon despite the weather :) Anyways, I wanted to share with you a review on Benefit's Hervana Blush. This blush is gorgeous!! It looks amazing on your cheeks. Its very subtle and not an "in your face" blush. I really, really like it!


Is the packaging not the cutest?! I love the packaging :)


So the colors are gorgeous, it's a light pink color and when you swirl all the colors together it just gives you a "flushed" look on your cheeks, very natural. I just really love it! I picked this up at Ulta for $28.00, I know the price is kind of outrageous in my opinion. But for a great blush, I'll absolutely splurge for it :) You can also purchase this blush at Sephora.

ok, so that is my review of Benefit hervana blush. I hope you enjoyed it and have a wonderful day!! :)